Monday, April 10, 2017

Hangout with InkSmith

This afternoon we had a virtual Hangout with Doug from InkSmith to chat about the 'fixes' he made to our Canada150 Monuments so they would print successfully.

Doug created a slidedeck of screenshots in order to show us his process. (Thanks Doug!)


Aspects of our prints that required some 'tweaking':

Peace and freedom Monument:
The peace and freedom monument had a few errors to do with gravity that were changed. By adding blocks, Doug provided a base for the figures that were floating.
The statues were floating which was changed by putting flattened boxes underneath the feet.

Courage Monument
The shield was too thin and wouldn’t print. Doug brought a box in and flattened it and used holes to create the shield shape (genius!). If a shape is too thin the computer ignores it and you end up with an unfinished texture.

Sports
Sports was too thin and too finely detailed, so he used a different printer. Printer works using goo that hardens in uv light. The goo is in a layer and a projection is made on it using uv light. The uv light
causes the goo to harden creating the shape.


Other items discussed:
Software he used: Simplify pd
Simplify pd understands the 3d printer and shows the limitations. This is called slicing.

Fused deposition modeling: this is the type of printer like ours --> works like a glue gun.

Filament differences:
Pop bottle material (very durable? Not too expensive?)
Flexible material
Wood (sawdust and plastic)
Colour filament (white when hot grey when cool)
PLA (stuff we use, corn based, biodegradable)

Questions:
What kind of laser does the goo printer use?
Goo printer uses projector like class projector.

Grade 7s take a few minutes to post your own reflections based on this Hangout on your page. What surprised you? What did you learn? What do you still wonder about? 


Thanks to Niamh and Nikky for recording digital notes during our Hangout!


Thursday, April 6, 2017

Celebrating Canada's 150th - Design Project

Our Goal: to design monuments that reflect significant people, events, or aspects of life in Canada. 


We started by completing our own free write blogs based on the following questions:
  • What makes you proud to be a Canadian?
  • What makes Canada unique?
  • What do you wonder about Canada?
Here are a few class examples: 


Next, we visited websites such as the ones listed below to be inspired:

After some time reflecting and researching independently, we gathered as a class and began identifying topics and ideas. We used the process of consensus building to narrow down our overarching themes. This took some time and helped us grow in our ability to 'disagree agreeably'.
From here, students began working in teams to develop ideas and prototypes. Check out team pages for more information on each design.

Here is the design process outline we used throughout this Canada150 Design project.

Link: Canada150 Design Project Outline

We decided to create a website using Google Sites to share our prototypes and our design process.
Celebrating Canada's 150th - Design Project website

Natural Resources Monument
Sports Monument
Peace and Freedom Monument
Courage Monument
  
Multicultural Monument
Innovation Monument

Friday, February 10, 2017

Geometry Exploration

The topic of geometric properties has become the focus of our latest mathematics spiral. The possible connections with spatial reasoning and 3D printing have become quite obvious as we have worked our way through various explorations.

Specific Curriculum Expectations:
- Sort and classify triangles and quadrilaterals by geometric properties related to symmetry, angles, and sides, through investigation using a variety of tools and strategies
- Identify, through investigation, the minimum side and angle information needed to describe a unique triangle
- Determine, through investigation using a variety of tools relationships among area, perimeter, corresponding side lengths, and corresponding angles of congruent shapes
- Demonstrate an understanding that enlarging or reducing two-dimensional shapes creates similar shapes


Exploration 1: Student Guessing Game

Students worked with a partner to classify polygons according to geometric properties. One partner selected a plastic polygon and held it behind a barrier. This partner provided clues to help the other student draw the correct shape. This activity also involved significant spatial reasoning as the task involved creating mental images corresponding to the given clues in order to draw the correct polygon. I noticed students using hand gestures to ask questions (eg. folding hands to show symmetry, hands extended to show parallel sides, holding hands into position of angles). Although these students were not following the rules of the game, it did provide a glimpse into their thinking.

Examples of student clues:

"The shape is a polygon. It has 8 vertices. It is concave/irregular. It has an interior reflex angle. It has no lines of symmetry. It has one pair of parallel sides."

"It has 4 acute angles and 4 reflex angles. It has 4 lines of symmetry. It is a concave and irregular polygon. It has 8 vertices's and 8 sides. All sides are equal. It has no parallel sides. It has rotational symmetry."


Exploration 2: Designing Shapes for Primary Students

On quite a few occasions, primary teachers at our school have knocked on our classroom door looking for attribute blocks. I am lucky to have my own set (fortunate hand-me-down from my retired teacher mom) and am happy to lend it out as we have a shortage in our school inventory.

Over the years a few pieces have become missing and I requested that the Grade 7s help me print some new ones using our 3D printer - an opportunity to further develop our skills with designing and creating using our 3D printer while also filling a need for our school community.

Students thought it might also be helpful to create additional shapes for student use including a wider variety of regular and irregular polygons.

Examples of student thinking during design process:

"For the regular octagon we got a box and made it 10mm high and 20mm by 20mm wide. Then we got another box and put a hole threw it so then it could become a triangle we did that 4 times. After that we put all the blocks together and then grouped it and got our shape of a regular octagon."

"For the irregular octagon we started with a square, then we had to make 2 triangles to go on the side of it, Next we got a square and put it underneath and duplicated one of the triangles from before and then had two more triangles to put on the side of it. And finally we grouped together."

More to come as we begin printing these polygons ....

Friday, December 2, 2016

Puzzle Cube Project: Spatial Reasoning & Design Thinking

The first 6 weeks with our 3D printer centered around experimentation and debugging. We familiarized ourselves with TinkerCad, conducted research, and spent many hours grappling with our failed prints and mishaps. With our new motor installed, and heightened appreciation for the functionality of this amazing tool, we got started on our first design project.


I brought a few wooden mind puzzles into the classroom for interest and relaxation, but also for their value in developing spatial reasoning. They provided us with the inspiration we needed for our first project!

My purpose for integrating 3D printing in the classroom stems from a curiosity of students' spatial reasoning abilities and how designing and creating in a virtual 3D world might enhance their thinking. These capabilities are essential in many STEM careers (science, technology, enginering, and math) and are linked with overall mathematical performance. Spatial reasoning is an area in mathematics education that is a bit of a mystery.
And who doesn't love a good mystery, right?


"A focus on spatial thinking allows mathematics to become a more visual endeavour and connects with what “real” mathematicians do when they are exploring patterns in the world and making discoveries. By exploring the spatial aspects of mathematics, we make it more accessible, more engaging and more relevant" (Ontario Ministry of Education, 2014).


Our project began with students individually creating their own physical representations using either centicubes or larger snapcubes. Their cubes needed to be 3 x 3 using at least 5 different pieces. I noticed how one student took his cube pieces apart and recognized that two of his shapes were identical when flipped. This type of vocabulary use was common as students shared their representations.

Later in groups, the students selected a design for their project. The idea behind this was for students to make comparisons, discuss design specifications, and collaborate during the 3D rendering process. Also, after our first piece printed, we recognized it takes about 1.5 to 2 hours per piece!

Groups either decided to make each square 1cm or 1.5cm which they later converted to mm (more precise when rendering on TinkerCad). Some partners figured out dimensions first then generated shapes based on those dimensions. Others created individual squares and duplicated them to form their pieces.

Quite a few challenges were faced during the rendering process:
- Duplicating cubes
- Aligning cubes once duplicated
- Placing cubes on top of each other
- Grouping objects (to keep alignment)
- Removing/deleting blocks
- Resizing


Students experimented with different tools in the tool bar, shared their learning to help others along, and searched for forums or youtube videos when they got stuck. I love being able to authentically say "I don't know, let's figure it out". This is learning!

To eliminate the need for the 3D printer to generate supports, some pieces needed to be flipped for stability while printing. This is something we determined while looking at the pieces in the M3D software and questioning what the results might be.

It took about a week to print all the cubes. We are learning about patience during this process!

We experienced a few minor printing errors along the way (eg. print not sticking to the bed). We solved this by slightly increasing the temperature (from 215-225 degrees) and using painters tape on the print bed (thanks to M3D user feedback). 

Now that our puzzle cubes are printed, we are going to share them with other classes to see if they can figure them out!


Student Reflections:
"We got a bit stuck on how to stack shapes so I found this video. In this video we learned that you have to click the black button to lift the object."

"The puzzle pieces are going to be three or four attached cubes each and when put together correctly will form a cube. We started the puzzle by creating rough drafts using centicubes. The best one was chosen and we each picked two or more pieces in to design on tinker cad. We decided on creating a rather small puzzle cube (10 mm by 10 mm by 10 mm) unlike some other groups who did 15 mm by 15 mm by 15 mm and I am excited to see if it works and if not then to see what went wrong. Also I wonder which measurement is more appropriate and whether the larger one will be much easier to use."

"Today we designed a puzzle cube using Tinker Cad. We had to make a puzzle cube with connecting blocks before we made the real thing in tinker cad to figure out which shape and size we wanted the blocks to be. Our group decided we wanted to make our blocks 1.5 centimeters for all the measurements of the blocks." 


"Our piece we had to design was one that had 5 cubes on the bottom and 1 cube on top. It was very easy to construct the bottom but it took a little more trial and error to do the one piece on the top because we had to figure out how to put the cube in the air and make sure it wasn't floating. Once everyone has constructed their pieces we will print them one at a time. When all of them are done we will give them to classes to try and figure them out."


Ontario Ministry of Education. (2014). Paying Attention to Spatial Reasoning. Retrieved from http://www.edu.gov.on.ca/eng/literacynumeracy/lnspayingattention.pdf

Friday, November 25, 2016

Hangout with Mr. S

Learning About Microns: Class Blog

This afternoon we connected with a parent expert in our class who works with machinery to produce metal works. As an mechanical engineer, he had lots of teach us about design and product production.

With our 3D printing project, we keep seeing the word "micron" and wondered what it's all about. Mr. S was in our classroom for conferences, noticed the word on the board, and mentioned that he could help us out. Very cool! Connecting with experts in the real world is so valuable for expanding our learning and making it more memorable.

What are Microns?
Microns are a very fine unit of linear of measurement.
1 micron = millionth of a meter
1000 microns = 1mm
1 human hair =40-80 microns 

At his workplace, measurements have to be perfect to get exact results for parts and products for customers. For example, they have printed landing gear for aerospace designs!

Mr. S showed us the gauge they use to measure microns. Since it is measuring units so small, you need to be very careful when using it. 

He took us on a tour of the shop and showed us a metal Eiffel Tower being trimmed by the machine. It is about 0.5m tall.

http://www.ferrotechnique.com/

It was very helpful for us to 'hangout' with Mr. S today and we are now connecting our learning about microns with our 3D printer. 

Wednesday, November 23, 2016

STL file type

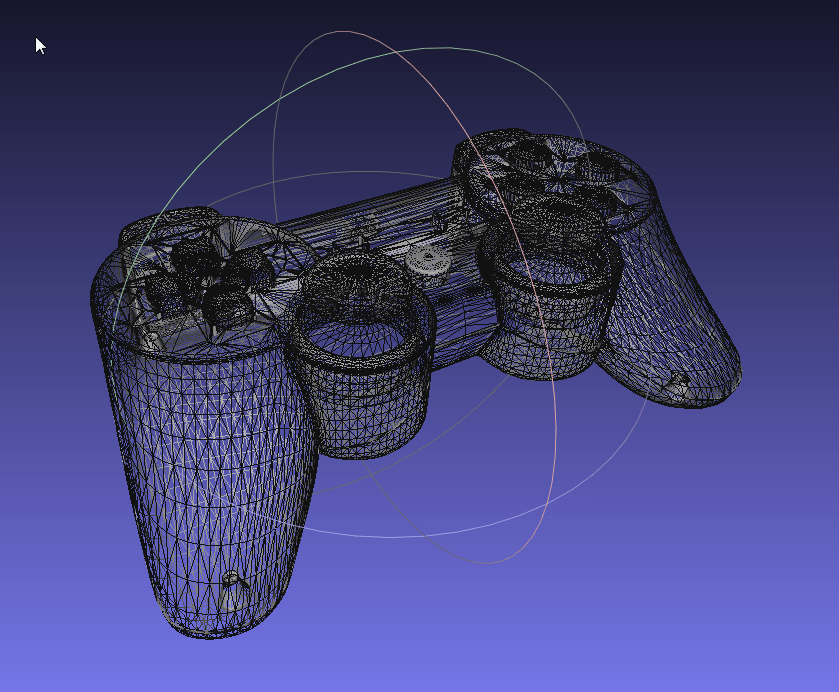
The STL file is the format for a 3D item, like how an image is JPEG and PNG. It contains the data of the layout of a three dimensional object. There is multiple layouts that can be used for 3D printing but STL is one of the most popular ones. Information to the hardware and loads what the 3D printer should make. It uses the formatting tools to make a series of linked, tiny triangles that recreates the surface of the object you are trying to print. The STL file is essential to your 3D print because without it, the Motherboard wouldn't even know what it was supposed to print! Like all files, the STL file can be downloaded and loaded onto your 3D printing program, and can be damaged. Microns are also important because when creating a geometrical shape because the triangles are made up of microns. The STL file is important to 3D printing is it can make even the most complex designs simplistic. The disadvantages of the STL file rather than other file types is the STL file type does not specify things like texture, colour and material. STL files can be opened and downloaded easily.

Research about PLA + ABS Filament


                                                           PLA Filament + ABS Filament

The difference between  PLA and ABS :

  • both thermoplastics
  • moister laden ABS will bubble and spurt from the tip of the ext router
  • PLA uses lower temperature  then ABS 
  • PLA may experience DE colorization 
  • they are both thermoplastics that means you can shape them when they are heated 
  • PLA is poly lactic acid 
  • the formula for the PLA filament is (C3,H4,O2)n
  • PLA is more Eco friendly
  • ABS is better to make things that are stronger 
  • PLA is much more ridged 
  • PLA is a bio polymer,a biodegradable plastic. such as cornstarch or sugarcane. Aside  is typically used for packaging material, plastic wrap, plastic cups and plastic water bottles
  • PLA = Poly Lactic Acid)
  • PLA renewable raw materials ( made from plants )
  • ABS ( Acrylonitrile - Butadiene Styrene )
  • FDM stands for fused  deposition modeling 
  • ABS is an oil-based plastic
  • ABS is tough material that can be used to create plastic objects for everyday use, for example in cars, electrical equipment or even in the popular Lego bricks.